Bài học ngày hôm nay sẽ giúp các bạn sử dụng được class Sprite và di chuyển đối tượng Sprite quanh màn hình.
Chúng ta sẽ sử dụng ví dụ có sẵn ở đây. Bạn hãy download nó về và sử dụng.
Tôi đã chuẩn bị một ảnh cho chúng ta trong bài này. Đó là ảnh một chiếc xe tải trắng có kích thước 18x18 pixel với 4 hướng lên, xuống, trái, phải.

White Van Image
Frame Size:18x18 pixels
Hãy bật Netbeans, mở project ví dụ ra và chúng ta bắt đầu.
Thêm vào hai biến, một cho ảnh và một cho sprite dưới hàm constructor của clsCanvas
Giờ chúng ta load ảnh và khởi tạo đối tượng Sprite, hãy chỉnh sửa phương thức load( ) như sau
Constructor của Sprite( ) có 3 tham số:
Và phương thức vẽ được gọi trước flushGraphics( ):
Để test thành quả, chúng ta cho chạy thử:
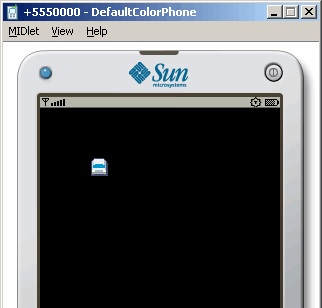
Tiếp theo là làm cho chiếc xe chạy được 4 hướng: Lên, xuống, trái, phải. Đầu tiên chúng ta lấy tọa độ của sprite và lưu vào 2 biến. Thêm hai dòng sau vào trong phương thức run( ):
Chúng ta thay đổi giá trị đó tùy theo phím được nhấn. Thêm những dòng code sau vào dưới lời khai báo hai biến vừa viết:
Đoạn code trên kiểm tra phím nào vừa được nhấn và thay đổi frame của chiếc xe cho phù hợp với hướng đi. Sau đó nó tính toán vị trí cho chiếc xe và vẽ lại lên vị trí mới.
Chúc các bạn thành công !!
Chúng ta sẽ sử dụng ví dụ có sẵn ở đây. Bạn hãy download nó về và sử dụng.
Tôi đã chuẩn bị một ảnh cho chúng ta trong bài này. Đó là ảnh một chiếc xe tải trắng có kích thước 18x18 pixel với 4 hướng lên, xuống, trái, phải.
White Van Image
Frame Size:18x18 pixels
Hãy bật Netbeans, mở project ví dụ ra và chúng ta bắt đầu.
Thêm vào hai biến, một cho ảnh và một cho sprite dưới hàm constructor của clsCanvas
private Image imgVan;
private Sprite Van;
    /** Creates a new instance of clsCanvas */
    public clsCanvas(midMain m) {
Giờ chúng ta load ảnh và khởi tạo đối tượng Sprite, hãy chỉnh sửa phương thức load( ) như sau
    public void load(){
        try{
            // load the images here
            imgVan = Image.createImage("/images/van.png");
        }catch(Exception ex){
            // exit the app if it fails to load the image
            isRunning = false;
            return;
        }

        // initialize the Sprite object
        Van = new Sprite(imgVan, 18, 18);

        // show the frame 1 - the second frame
        Van.setFrame(1);

        // move to 50, 50 (X, Y)
        Van.setPosition(50, 50);
    }
Constructor của Sprite( ) có 3 tham số:
- Image image - ảnh có chứa các frame hình
- int frameWidth - chiều rộng mỗi frame
- int frameHeight - chiều cao mỗi frame
Sau khi khởi tạo sprite, chúng ta dùng phương thức setFrame( ) của lớp Sprite để đặt frame hiện tại là 1. Frame tính từ bên trái qua và chỉ số bắt đầu từ 0. Chúng ta cũng khởi tạo vị trí cho sprite với vị trí 50, 50 (X, Y) trên màn hình.
Sau đó chúng ta viết phương thức unload( ) để dùng khi không còn sử dụng ảnh và sprite nữa:
    public void unload(){
        // make sure the object gets destroyed

        Van = null;
        imgVan = null;
    }
Và phương thức vẽ được gọi trước flushGraphics( ):
           // draw the sprite
           Van.paint(g);
           flushGraphics();
Để test thành quả, chúng ta cho chạy thử:
Tiếp theo là làm cho chiếc xe chạy được 4 hướng: Lên, xuống, trái, phải. Đầu tiên chúng ta lấy tọa độ của sprite và lưu vào 2 biến. Thêm hai dòng sau vào trong phương thức run( ):
           // get the current position of the van
           int cx = Van.getX();
           int cy = Van.getY();
           //restore the clipping rectangle to full screen
           g.setClip(0, 0, screenW, screenH);
Chúng ta thay đổi giá trị đó tùy theo phím được nhấn. Thêm những dòng code sau vào dưới lời khai báo hai biến vừa viết:
           // get the current position of the van
           int cx = Van.getX();
           int cy = Van.getY();

           if ((iKey & GameCanvas.UP_PRESSED) != 0){
               // show the van facing up
               Van.setFrame(0);
               // move the van upwards
               cy--;
           } else if ((iKey & GameCanvas.DOWN_PRESSED) != 0){
               // show the van facing down
               Van.setFrame(1);
               // move the van downwards
               cy++;
           } else if ((iKey & GameCanvas.LEFT_PRESSED) != 0){
               // show the van facing left
               Van.setFrame(2);
               // move the van to the left
               cx--;
           } else if ((iKey & GameCanvas.RIGHT_PRESSED) != 0){
               // show the van facing right
               Van.setFrame(3);
               // move the van to the right
               cx++;
           }

           // update the vans position
           Van.setPosition(cx, cy);
           //restore the clipping rectangle to full screen
           g.setClip(0, 0, screenW, screenH);
Đoạn code trên kiểm tra phím nào vừa được nhấn và thay đổi frame của chiếc xe cho phù hợp với hướng đi. Sau đó nó tính toán vị trí cho chiếc xe và vẽ lại lên vị trí mới.
- Lên - giảm giá trị của Y
- Xuống - tăng giá trị của Y
- Trái - giảm giá trị của X
- Phải - tăng giá trị của X
Sau đây là code hoàn chỉnh lớp clsCanvas:
package MyGame;

import javax.microedition.lcdui.Graphics;
import javax.microedition.lcdui.Image;
import javax.microedition.lcdui.game.GameCanvas;
import javax.microedition.lcdui.game.Sprite;

public class clsCanvas extends GameCanvas implements Runnable {
// key repeat rate in milliseconds
public static final int keyDelay = 250;

//key constants
public static final int upKey = 0;
public static final int leftKey = 1;
public static final int downKey = 2;
public static final int rightKey = 3;
public static final int fireKey = 4;

//key states for up, left, down, right, and fire key
private boolean[] isDown = {
    false, false, false, false, false
};

//last time the key changed state
private long[] keyTick = {
    0, 0, 0, 0, 0
};

//lookup table for key constants :P
private int[] keyValue = {
    GameCanvas.UP_PRESSED, GameCanvas.LEFT_PRESSED,
    GameCanvas.DOWN_PRESSED, GameCanvas.RIGHT_PRESSED,
    GameCanvas.FIRE_PRESSED
};

private boolean isRunning = true;
private Graphics g;
private midMain fParent;

private Image imgVan;
private Sprite Van;
    /** Creates a new instance of clsCanvas */
    public clsCanvas(midMain m) {
        super(true);
        fParent = m;
        setFullScreenMode(true);
    }

    public void start(){
        Thread runner = new Thread(this);
        runner.start();
    }

    public void load(){
        try{
            // load the images here
            imgVan = Image.createImage("/images/van.png");
        }catch(Exception ex){
            // exit the app if it fails to load the image
            isRunning = false;
            return;
        }

        // initialize the Sprite object
        Van = new Sprite(imgVan, 18, 18);

        // show the frame 1 - the second frame
        Van.setFrame(1);

        // move to 50, 50 (X, Y)
        Van.setPosition(50, 50);
    }

    public void unload(){
        // make sure the object gets destroyed
        Van = null;
        imgVan = null;
    }

    public void checkKeys(int iKey, long currTick){
        long elapsedTick = 0;
        //loop through the keys
        for (int i = 0; i < 5; i++){
            // by default, key not pressed by user
            isDown[i] = false;
            // is user pressing the key
            if ((iKey & keyValue[i]) != 0){
                elapsedTick = currTick - keyTick[i];
                //is it time to toggle key state?
                if (elapsedTick >= keyDelay){
                    // save the current time
                    keyTick[i] = currTick;
                    // toggle the state to down or pressed
                    isDown[i] = true;
                }
            }
        }
    }

    public void run() {
       int iKey = 0;
       int screenW = getWidth();
       int screenH = getHeight();
       long lCurrTick = 0; // current system time in milliseconds;

       load();
       g = getGraphics();
       while(isRunning){

           lCurrTick = System.currentTimeMillis();
           iKey = getKeyStates();

           checkKeys(iKey, lCurrTick);

           if (isDown[fireKey]){
               isRunning = false;
           }

           // get the current position of the van
           int cx = Van.getX();
           int cy = Van.getY();

           if ((iKey & GameCanvas.UP_PRESSED) != 0){
               // show the van facing up
               Van.setFrame(0);
               // move the van upwards
               cy--;
           } else if ((iKey & GameCanvas.DOWN_PRESSED) != 0){
               // show the van facing down
               Van.setFrame(1);
               // move the van downwards
               cy++;
           } else if ((iKey & GameCanvas.LEFT_PRESSED) != 0){
               // show the van facing left
               Van.setFrame(2);
               // move the van to the left
               cx--;
           } else if ((iKey & GameCanvas.RIGHT_PRESSED) != 0){
               // show the van facing right
               Van.setFrame(3);
               // move the van to the right
               cx++;
           }

           // update the vans position
           Van.setPosition(cx, cy);
           //restore the clipping rectangle to full screen
           g.setClip(0, 0, screenW, screenH);
           //set drawing color to black
           g.setColor(0x000000);
           //fill the screen with blackness
           g.fillRect(0, 0, screenW, screenH);

           // draw the sprite
           Van.paint(g);
           flushGraphics();

           try{
               Thread.sleep(30);
           } catch (Exception ex){

           }
       }
       g = null;
       unload();
       fParent.destroyApp(false);
       fParent = null;
    }
}
Chúc các bạn thành công !!
chao, cai khung in code của bạn, tích hợp dc code high light cho dễ đọc thì hay hơn.
Trả lờiXóabài viêt hay đó
Cảm ơn bạn rất nhiều vì lời nhận xét, mong bạn tiếp tục cho mình thêm nhận xét về nội dung bài nhé
Trả lờiXóaCho mình hỏi class sprite bạn hướng dẫn viết ở đâu vậy?
Trả lờiXóatui dùng eclipse sài không được
Xóa